Decided to utilize the recently acquired A-Justo-jig on building the SF4 (SunFli IV) I've had in inventory for a few years. The jig instructions were fairly straightforward on how to assemble the jig. I substituted most of the jig's screw hardware with socket-head screws. This makes the jig easier to assemble and makes adjustments of setting rib spacing and dihedral much easier. The jig's instructions lack practical examples and or pictures on how to configure the jig for different wing platforms. I had a couple of false starts setting up for the SF4 wing but managed to produce a high-quality wing. The jig allows constructing up to a 70" wing in one piece. Plus having the ability to rotate the wing 360 degrees on the jig enables applying top and bottom sheeting, cap strips servo bays, landing gear blocks among other elements before removing the wing from the jig. I'm looking forward to using the jig to construct the fuse.
Tuesday, December 22, 2020
Thursday, December 3, 2020
Wing Jig
I recently picked up a NIB A-justo-jig which included complete jig fixtures for constructing wings and fuselages. This will come in handy for building the Dirty Birdy and Sun Fli IV kits I have in inventory. Many years ago I was given a used A-justo-jig for wings. It was missing some parts, however, there was enough there to enable building a few wings and to appreciate the value it offered. Glad I came across the opportunity to own a complete jig.
Monday, November 30, 2020
Sebart Avanti EDF
Mini Avanti S is ready for its maiden flight.
Equipment:
- JP Hobby 90mm 8S fan
- Castle Edge Lite HV120 ESC
- effflux RC heavy-duty struts
- Roaring Top 8S 5000mAh
- Roaring Top 1200mAh Rx
- Futaba HV MG servos on flying surfaces
- Futaba HV mini nose gear steering
- Futaba 5v regulator on retracts
- Maxx Products wheels
Thursday, November 12, 2020
Sunday, November 8, 2020
Epic Evo update
Epic Evo update:
Have logged 10 flights to date...I continue to make adjustments to achieve the feel I desire. To improve the pitch feel the elevator clevis was moved in one hole at the servo. I am planning to move that in an additional hole before the next flying session which should reduce/minimize the expo amount and improve the resolution.
The last couple of flights were in front of a fellow pattern pilot who commented on how constant the speed was with the up, down, and horizontal lines. I mentioned I had changed to an APC 22x13 carbon prop plus made adjustments to the throttle curve and in-out throttle channel response. I like this prop a lot and plan to test its performance on my Epic + and Invitation G2.
Saturday, October 31, 2020
CA Model's Epic Evo
Epic Evo
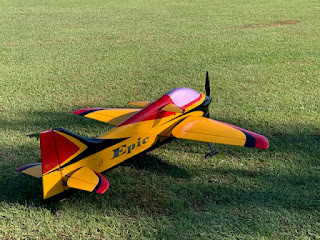
A successful an uneventful maiden occurred 10/27/20 at my club field. Today (Saturday) conditions were perfect for fine-tuning trim feel of throws, expo, CG, and wing incidence. Having gone through this with the Epic + knowing what was possible shorten the process somewhat. By the fourth flight, I was able to fly through the current Masters sequence reasonably well. The Evo is proving to be an improvement over the Epic +.
Evo:Futaba 32MZ w/HV servosHacker C54 - Budd mountD3 ControllerTP 5000 10s 25cTP 910 2s 25c rxTech-Aero regulatorAPC 21.5x13 carbonFalcon spinner, gear, and pantsRTF weight - 4762 gr
Monday, October 26, 2020
D3 controller installation
Mounting the D3 in direct airflow.
First and foremost I am believer in Adam Debowski's controller performance for F3A competition models. I now have three models outfitted: Invitation G2/Hacker C50 14xl comp, Epic Evo/Hacker C54, Passion Bipe/Plettenberg 30-10 which I use as a testbed for new equipment.
The following illustrates how I retrofitted my Epic Evo setup to use the D3 by mounting it in direct airflow as recommended by Adam.
The Evo has a removable battery tray. I mounted it to the front of the tray using an aluminum bracket to mount the D3
Sunday, August 2, 2020
P-Shooter, designed by Hal Debolt
Tuesday, July 14, 2020
Reflections
Sunday, July 12, 2020
CA Models Epic Evo
- Futaba 32MZ
- Futaba HV digital servos
- Futaba R7008SB Rx
- Futaba SBS-01RB Brushless RPM Sensor (temporary, setup D3)
- Hacker C54 comp
- Adam Debowski's D3 Esc
- Falcon 82mm spinner
- APC 21 X 13.5 Carbon prop
- Falcon landing gear/pants
- MPI wheels
- Central Hobbies NMP axles
- Thunder Power 5000mAh motor battery
- Thunder power 910 mAh Rx battery Tech-Aero regulator


