
Friday, January 14, 2022
2022 Winter Practice
Texas winter 2022 so far has been mild compared to 2021. Today’s temps were in the low 70s with a moderate south wind. Those conditions lured me out of the workshop to the club field to begin sorting out the 22-23 AMA Masters sequence. The first 2 maneuvers after takeoff are challenging. You gotta be sure to roll in an intended direction to ensure not to score a zero in the double stall turn and in the fighter turn roll as to position the plane in vs out. Other than those two the rest of sequence is a matter of figuring out the nuances of how execute them to maximize scoring. Practice, practice, practice….

Wednesday, January 5, 2022
Epilogue ARC Progress - Monokote (wing/stab tops)
Finished the wing and stab tops. This included adding black pin stripes to compliment the stripes on the fuselage using a Monokote on Monokote method provided by a friend. In the past, I haven’t had much luck with Monokote on Monokote eliminating unsightly air bubbles. By following my friend’s advice I am very pleased with the results. I plan to do more of this on future projects.
T-Can wing and rudder are next on the list to cover.
Monokote on Monokote process:
- Clean Monokote surface
- Saturate surface with Windex (enough to float trim piece to desired location)
- Using a tissue, lightly wipe away excess Windex. During this step, if trim piece needs repositioning apply Windex if needed
- Using a credit card or similar (old AMA card worked best for me) squeegee to remove air pockets from underneath trim piece
- Let stand for 60 minutes
- Squeegee again to remove any remaining air pockets
- Let stand for 24 hour
- Squeegee again if needed to ensure there are no remaining air pockets
- Use low iron heat with a sock covering the iron shoe to secure trim to the surface. It’s a good idea to test iron heat on scrape pieces. The goal is to activate the trim piece adhesive without detaching the Monokote underneath from the main surface
- Use higher heat to secure the edges of the trim piece, like at the wing root and tip edge


Friday, December 24, 2021
Epilogue ARC Progress - Monokote (wing/stab bottoms)
Okay, just finished Monokoting the wing and stab bottoms. I'm going with a basic hopefully very visible color/scheme layout. Cub yellow-based schemes with dark contrasting colors dark red and black are visible to me in most sky conditions. The exception are those cloudless blue sky conditions. This is where dark red on the fuse and on top of the wings and stabs becomes beneficial. To me, light red, blues, and white are difficult to see at distance and at times can become invisible in certain orientations.
I'm in the process of deciding between two different scheme layouts for the top of the wings and stabs. I hope to have the Monokote work completed in the next few days.
Wing and stab bottoms


Various tools used for Monokoting

Wednesday, December 1, 2021
Epilogue ARC Progress - paint (step 3 - black)
Okay, the final masking and painting of colors are behind me. With the effort and man-hours, I've logged so far on this project I have a greater appreciation of purchasing a custom-painted ARF. So far I am very happy with the results. Next steps involve wet sanding then applying clear coat.
Step 3 - black


Tuesday, November 30, 2021
Epilogue ARC Progress - paint (step 2 - red)
Spent the morning prepping for step 2, shooting red by reverse masking over the yellow and areas that will be painted black. With just one more color to shoot I can now see the finish line ahead. This scheme is simple, designed to be functional, not to win a beauty contest.
I plan to wet sand and buff the paint prior to clear coating with 2k High Gloss ClearCoat ou of the can which I just ordered thru Amazon.
Step 2 - red


Monday, November 29, 2021
Epilogue ARC Progress - paint (step 1 - yellow)
First and foremost let me say I really do not like the painting process. Compared to Monokoting there are way too many steps to achieve the desired finish, risks to one's health, along with potential property damage if you don't have a paint booth.
My paint selection is based on ease of application and the ability to match Monokote which I prefer to use on the wings, stabs, and rudder. On my last paint project, Invitation G2 ARC I chose Wings West which I will be using on the Epilogue They offer Monokote matching colors in 4oz sizes that are ready to spray. I do regret not ordering white primer from Wings West. The gray primer I used on the seams, around the nose ring and canopy areas required more paint then expected to cover. Oh well live and learn.
This paint does require clear coating. The finished result of the Invitation was light, the RTF weight is 4890g, although I chose not to spend time and effort wet sanding and polishing. With it being fall leading to winter with limited flying opportunities I plan to put forth the effort on the Epilogue to sand and polish after clear coating to remove imperfections and increase the luster of the paint.
Color scheme plan

Step 1 - yellow


Monday, November 15, 2021
Sun Fli IV update
Basic airframe including radio install, fuel tank, and landing gear completed. Next is final sanding before applying Monokote. The scheme will consist of my traditional colors of red, yellow, and black. Covering will start after completion of the BJ Craft Epilogue currently on the bench.
Assembled airframe


Tuesday, November 9, 2021
SE Texas fall pattern practice
This time of year the weather is perfect to spend time outdoors especially in SE Texas. With the absence of the hot summer heat making the air turbulent, the conditions both dawn and near dust are ideal for practicing, testing, and making tweaks to new/old, pattern equipment.
After experiencing the improved flight characteristics in my EPIC Evo and Invitation G2 with the D3 ESCs I chose to reach back and update the ESC in a reliable competitive platform, Epic+ with Adam Debowski's D3 controller too. The results are amazing. When a non-pattern flying club member on the sidelines comments, "how are you able to achieve similar downline airspeed as your upline airspeed", pretty much confirms the upgrade was worth it. Yesterday and today I logged several flights, fine-tuning setups on the D3 equipped Epic+ which first flew in 2018. I am pleased the upgrade from the Castle HV 85 Lite and setup changes were worth the effort. I am excited in logging more flights to this Hacker C50 14XL powered airframe now with the D3 and improve its competitiveness even more
The following picture was taken at the SPARKS RC Club 10092021 ~5:00pm

Friday, October 22, 2021
Epilogue ARC Progress - battery tray
How and where to install a battery tray can be tricky. Over the years I've witnessed multiple inflight battery ejections as a result of poor tray design, poor installation execution, or the use of low-grade velcro to secure the battery to the tray. Three basic practices I follow when designing a battery tray are: 1) Secure the tray to the landing gear mount, 2) Secure the battery to the tray using a screw-down locking method, not velcro, 3) Tray must be removable to allow servicing the tray or other components.
The following pictures show the various parts of the tray I designed used on the last three 2m planes, plus the final installed position. I use Fiberglass/Honeycomb Sandwich Panels from ACP Composites for the tray floor, locking plate, and circular screw hold-downs. Another great alternative for the tray floor is balsa/plywood carbon sandwich plates from Esprit Tech. These materials are much lighter and stronger than traditional lite plywood. that is typically used The tray floor is attached to graphite tubes using 2-56 screws with blind nuts. The graphite tubes are then secured to the fuselage sides with F3AU's Battery Tray Bracket Kit. Dowel hardpoints are added wherever screws passed thru the honeycomb panel plus reinforced those areas with 1/64th plywood. Hysol epoxy was used to attach the F3AU bracket mounts to the fuselage.
The tray is fully removable, very strong and durable, and firmly attached to the fuse sides and landing gear formers with a single screw located near the center of the tray floor. When this screw is tightened the floor rests on the gear mount formers which will prevent the tray from rocking or flexing during inflight G loads. The total tray weight is 58 grams.
Tray Components

Tray Underside


Tray Location


Saturday, October 2, 2021
Epilogue ARC Progress
Epilogue progress:
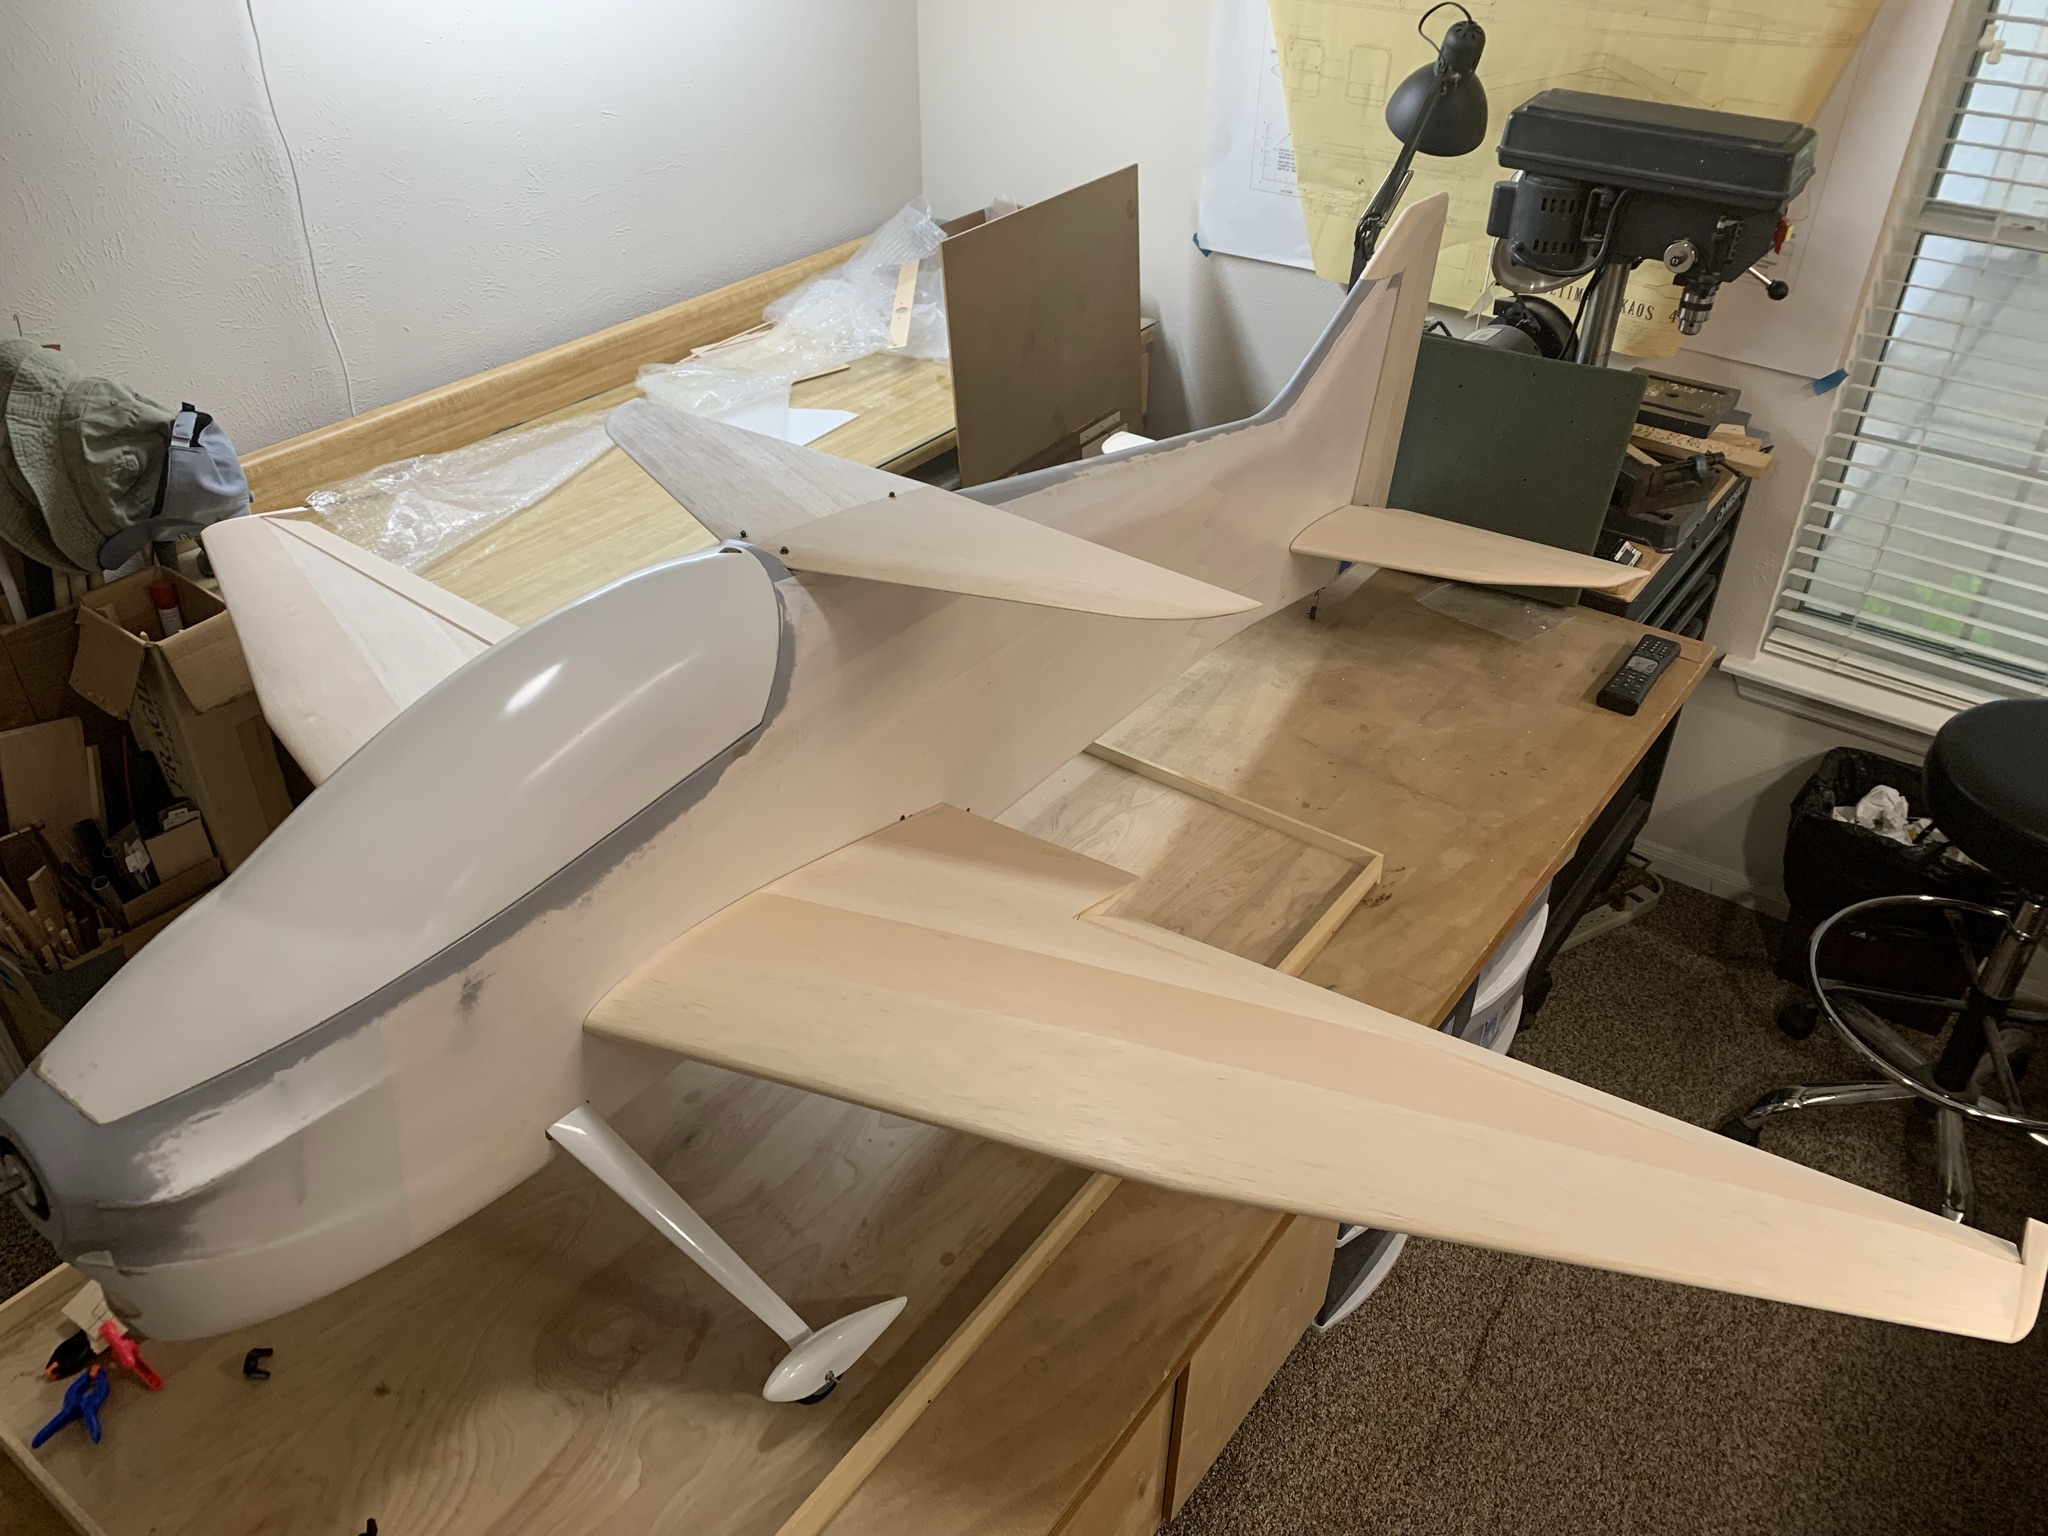
Scrubbed/washed the fuse to remove mold release. Applied filler and primer to the seam then wet sanded smooth to touch. Fitted servos in the wings and stabs plus the rudder in the fuse for pull-pull. Used the dremel router attachment to route slots in the ailerons, elevators and rudder to accept carbon control horns. I have elected to outfit the wings with traditional balsa tips instead of the supplied carbon wing tip plates.
Next step is to approximate where to position the motor battery tray. This involves assembly of the airframe components with the motor batteries shifting them fore and aft to determine the cg range of 200 to 260mm measured from the wing’s leading edge. It’s not surprising to have such a rearward cg option with swept wings. Plan is to try using the removal battery tray system marketed by F3AU.


Subscribe to:
Posts (Atom)